
Many DIY enthusiasts plunge into tiling projects without having a firm grasp on tile calculation. They’re halfway through their bathroom renovation when they realize they don't have enough tiles to finish the job. Or perhaps, they find themselves drowning in surplus tiles, trying to find creative ways to repurpose them.
Before you head over to one of our tile stores in Miami to pick up your products, let us spare you the headache and help you calculate the exact number of tiles you need.

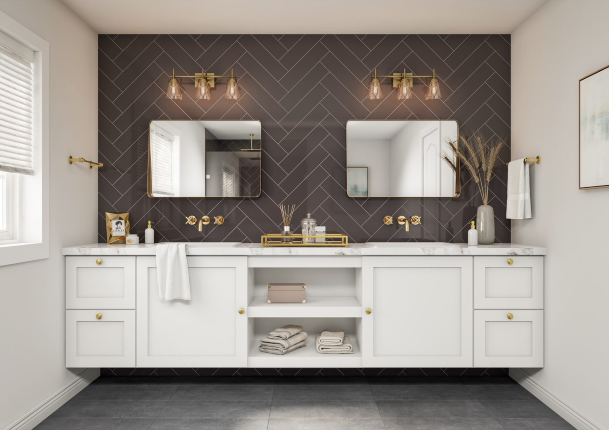
Calculating Tile for Square and Rectangular Spaces
When it comes to tiling square and rectangular spaces, things might seem pretty straightforward at first glance. However, you need to pay attention to the details from the start to make sure everything looks perfect once it's done:
1. Measure the Space
Before you start calculating, grab your trusty tape measure and get the dimensions of the area you plan to tile. Measure both the length and width, and don't forget to account for any protrusions or recesses that might affect the layout.
2. Calculate the Square Footage
With your measurements in hand, it's time to determine the square footage of the space. Simply multiply the length by the width to get the total square footage. For example, if your space measures 10 feet by 8 feet, the calculation would be 10 x 8 = 80 square feet.
At D&B Tile, we sell most of our products by the square foot to simplify your project planning and make your job easier.
3. Factor in Tile Size for Waste
The size of the tiles you plan to use is important because it determines how much waste will be generated during installation.
Larger tiles often result in less waste compared to smaller ones because they cover more surface area with fewer individual pieces. This reduces the number of cuts needed to fit them into the space, which minimizes leftover scraps.
For instance, a tile measuring 24x48 inches can produce approximately 15% waste, whereas larger tiles, like those sized 48x96 inches, can see waste rise to around 25%. With the assistance of our showroom design consultants, you can get in touch with a qualified contractor who can help with the calculations and tile installation.
4. Account for Grout Lines
Don't forget about grout lines! These small gaps between tiles add up and can affect your tile calculation. Typically, you'll want to leave about 1/8 to 1/4 inch between tiles for grout.
Adjust your calculations with this information in mind to make sure you have enough tiles to cover the entire space, including grout lines.
Tile Calculation for Irregular Spaces
Tackling irregular spaces in tile installation may seem daunting, but with the right approach, you can conquer even the most challenging areas. Let's break it down step by step:
1. Assess the Irregularities
The first step in calculating tile for irregular spaces is to check the unique features of the area. Try to identify any angles, curves, or irregular edges that deviate from standard square or rectangular shapes.
2. Divide the Space into Sections
Irregular spaces often consist of multiple sections with different shapes and dimensions. Divide the area into manageable parts, each with its own set of measurements.
This step lets you tackle each section individually and makes the calculation process more manageable.
3. Measure Each Section
Once you've divided the space, measure each section separately. Take precise measurements of the length, width, and any irregularities within each section.
Don't forget to account for any protrusions, recesses, or curved edges that may affect the tile layout.
4. Break Down the Calculation
With the measurements in hand, calculate the square footage of each section using the same method as for square and rectangular spaces. Multiply the length by the width to determine the total size.
5. Consider Tile Placement
When you're faced with irregular spaces, how you place your tiles can mean the difference between a messy finish or a job well done.
Take a good look at the shape and size of your space, and then think about how the tiles should be laid out to make the most of it. You might need to get a bit creative here, adjusting the orientation of the tiles or even mixing in different sizes to work around any tricky spots.
Take your time to play around with different placement options until you find the perfect arrangement that brings your vision to life.
6. Calculate Tile Quantity
Once you have the square footage of each section and have planned the tile layout, you have to calculate the number of tiles needed.
Similar to square and rectangular spaces, getting help from an installation contractor will help you get a more exact number, reduce waste, and ensure your new tiles are placed properly.
7. Double-Check Your Measurements
Before finalizing your tile order, double-check your measurements and calculations to ensure they’re accurate. It's better to be safe than sorry, so take the time to review your numbers and make any necessary adjustments.

Other Tips to Consider During Tile Installation
Surface Preparation
Before laying tiles, you’ll have to prepare the surface properly. Check if the substrate is clean, flat, and free of any debris or contaminants.
Apply a primer or sealer before laying tiles to help them stick better and keep moisture out, especially in places prone to water like bathrooms or kitchens.
Tile Layout and Pattern
Carefully plan the layout and pattern of your tiles before starting installation. Consider factors such as:
- Room size: Larger rooms may benefit from bigger tiles to create a more spacious look. On the other hand, smaller rooms might require shorter tiles to maintain proportion.
- Tile size: Larger tiles can make a room appear more open and streamlined, while smaller tiles can add intricate detail and texture.
- Aesthetics: Choose tiles that complement the style of your home and reflect your personal taste.
- Lighting: Take into account the lighting conditions in the room where the tiles will be installed. Natural light can enhance the color and texture of tiles, while artificial lighting can affect their appearance.
- Functionality: For high-traffic areas like entryways or kitchens, go for durable and easy-to-clean tiles. In wet areas like bathrooms or laundry rooms, choose tiles with slip-resistant surfaces to prevent accidents.
Dry-lay tiles first to visualize the pattern and make any necessary adjustments before adhering them to the substrate.
Proper Tile Installation Techniques
Use the appropriate adhesive and trowel size for your tile and substrate type. To make sure you're using the right adhesive, check the instructions on the adhesive packaging to see if it's suitable for the type of tile and surface you're working with. Also, consider the conditions and how you're applying the adhesive to ensure it sticks well and lasts.
Spread the adhesive evenly, and don't forget to use spacers to keep your grout lines looking neat. Press the tiles down firmly and double-check for any bumps or uneven spots with a level.
Finally, be patient and give the adhesive enough time to dry before you start grouting.
Grouting Tips
- Choose the right grout color and type for your project, thinking about tile spacing and the desired look.
- Mix grout according to manufacturer instructions and work it into the joints using a grout float.
- Remove excess grout with a damp sponge
- Finish with a grout sealer to protect against stains and moisture.
Finishing Touches
Once the tiles are installed and grouted, don't forget the finishing touches. For instance, you can install trim pieces, such as bullnose tiles or transition strips, to create clean edges and transitions between different surfaces.
Here are some additional ideas:
- Apply a sealant to protect the tiles and grout from stains, moisture, and damage.
- Use caulk to fill in gaps and seams to give the tiles a water-resistant finish.
- Incorporate decorative tiles or inserts to add flair and personality to your tiled surfaces.
- Invest in quality cleaning products and tools to keep your tiles looking their best.
- Install under-cabinet lighting or accent lights to highlight your tiled surfaces.
- Coordinate your tile installation with your furniture and fixtures.
- Place a rug or mat in high-traffic areas to protect the tiles and add warmth and comfort to the space.
- Hang artwork or decorative items on tiled walls.
Remember to seal any expansion joints or gaps with silicone caulk to prevent water intrusion and give the space a professional-looking finish.
Seek Professional Advice
If you're feeling unsure about any part of the tile installation process or run into any difficulties along the way, don't be afraid to reach out for professional help.
A qualified tile installer or contractor can provide valuable advice and solutions to ensure your project meets the highest standards of quality.
At D&B Tile, we work with showroom design consultants who can recommend the correct installation contractor for your project. We’re one call or message away!

Get the Best Tile Products at Our Tile Stores in Miami
Looking for top-quality tile products and expert guidance for your next project? Your search ends here at D&B Tile. With our experience and premium tile selections, we have everything you need to ensure your renovation project exceeds expectations.
Reach out to our knowledgeable team today!